Worldwide Shipping

Keep It Cool Under Pressure: The Importance of Oil Coolers in Heavy Duty Engines

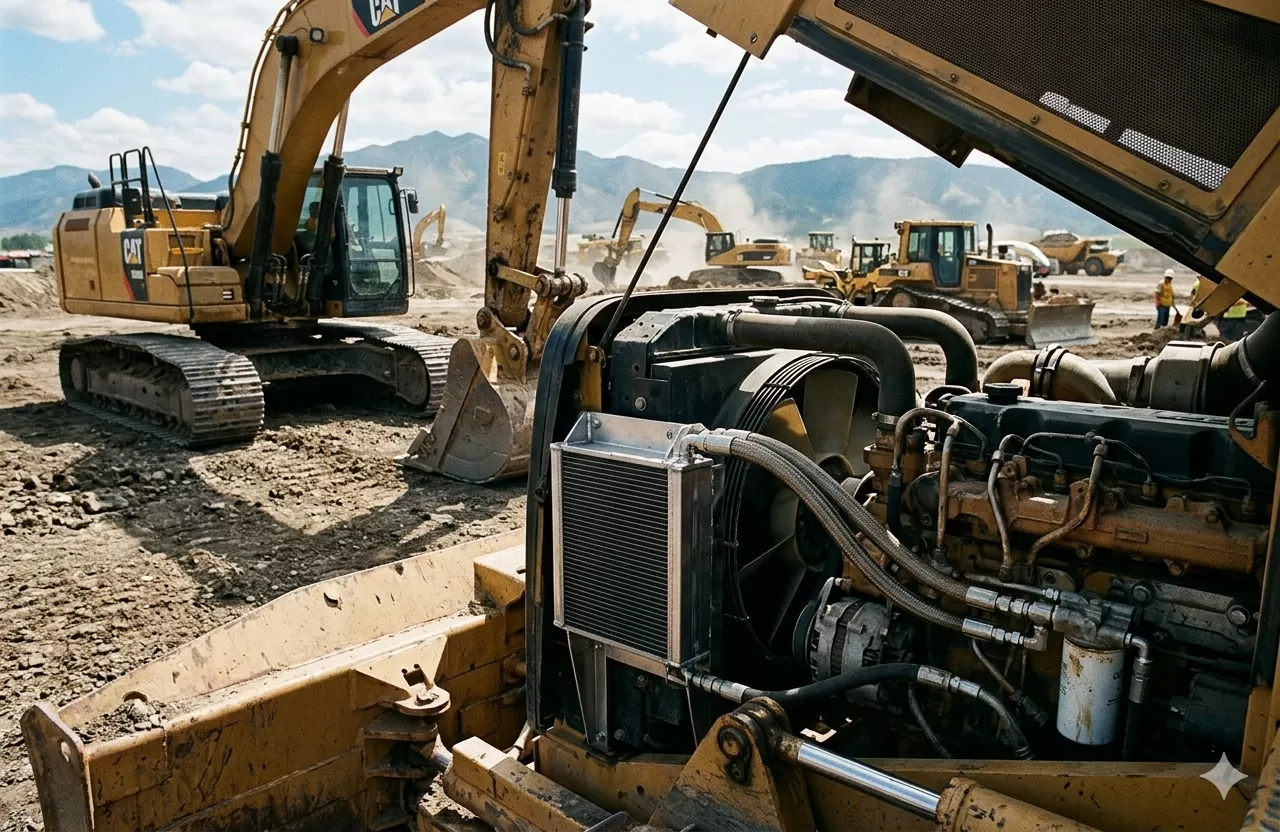
A heavy-duty diesel engine working at full load generates enough heat to destroy itself in minutes. The cooling system gets most of the attention — radiator, water pump, thermostat, fan — but there’s a second, smaller heat exchanger that decides whether the engine sees 10,000 hours or 4,000. It sits where almost nobody looks. It costs a few hundred to a few thousand dollars depending on the machine. When it fails, it doesn’t always fail loudly. It just quietly starts cooking the oil, contaminating the coolant, or both. And by the time the operator notices, the repair bill is no longer about the cooler.
Most equipment owners under-prioritize the engine oil cooler because it isn’t on the daily walk-around list. There’s no dipstick for it. No warning light dedicated to it. It doesn’t whistle, knock, or smoke until things are already very wrong. So it gets ignored — not out of negligence, but because nothing in the operator’s routine points to it. That’s exactly what makes it dangerous. A neglected oil cooler is a five-figure engine rebuild waiting for a hot afternoon to introduce itself.
This guide is written for the contractors, fleet managers, and mechanics who’d rather catch the problem at $400 than chase it at $40,000. It covers what an oil cooler actually does, the symptoms that show up before catastrophic failure, the inspection rhythm that keeps small problems small, and how to source a replacement that will outlast the warranty.
Quick answer: The engine oil cooler helps keep engine oil within the manufacturer’s recommended operating temperature range—typically around 180°F to 210°F in many heavy-duty diesel applications—so it can lubricate and protect engine components properly. When it fails — usually from internal corrosion, gasket fatigue, or clogged passages — oil and coolant mix, lubrication collapses, and the engine follows. Catching the first signs (milky coolant, unexplained coolant loss, rising oil temp) is the difference between a $500 cooler and a $25,000+ engine.
What the Engine Oil Cooler Actually Does
Engine oil does three jobs at once: it lubricates moving parts, it cleans them by carrying away combustion byproducts, and it absorbs heat. The third job is the one that goes sideways fast. A turbocharged diesel under load can push oil temperatures past 250°F in a hurry. Above that, the oil thins, the additive package breaks down, and the protective film between bearing surfaces gets thinner with every minute.
The engine oil cooler is the small heat exchanger that prevents that runaway. It pulls heat out of the oil before it gets fed back into the engine. Most heavy-duty designs fall into one of two categories.
Oil-to-coolant coolers are the most common design on construction and on-highway diesels. They’re sealed units with two separate flow paths — oil through one set of internal passages, engine coolant through the other — separated by thin metal walls or stacked plates that transfer heat between the two. The coolant then carries that heat out to the main radiator. Compact, efficient, and the standard on most excavators, dozers, and wheel loaders.
Oil-to-air coolers look like miniature radiators. Hot oil flows through finned tubes, and ambient airflow (often forced by a fan) carries the heat off into the atmosphere. They’re simpler, less prone to internal contamination failure modes, and common on smaller off-road equipment and on auxiliary systems where running the line back to the radiator isn’t practical.
Within both categories, the internal geometry varies — stacked-plate, tube-and-fin, shell-and-tube — and the specific design affects cooling capacity, flow restriction, and how the unit fails when it does. But the function is the same: keep the oil inside its working window.
Worth noting: the oil cooler isn’t only a cooler. On cold starts, it works in reverse — coolant warms up faster than oil, so the cooler actually heats the oil during warm-up, getting it into its operating temperature range sooner. A failing cooler hurts performance at both ends, not just in the heat.
Why a Failing Oil Cooler Costs So Much
Cooling system problems are widely recognized as one of the leading causes of major diesel engine failures in heavy-duty service, making cooling-system maintenance a critical part of engine longevity.
The oil cooler is a meaningful share of that. And what makes oil cooler failures expensive isn’t the cooler — it’s everything that happens downstream.
A typical replacement oil cooler for a mid-size excavator or wheel loader runs somewhere between $300 and $1,800 in parts depending on the machine class and cooler type. Labour adds another $400 to $1,500 because the cooler is often buried behind hoses, brackets, and sometimes the turbo. Total job: ballpark $1,000 to $3,500.
If the cooler fails internally and oil and coolant mix before anyone catches it, the math changes completely. Coolant in the oil destroys bearing surfaces, scores cylinder liners, and degrades the entire lubricant system within hours of operation. The result is an engine rebuild or full replacement — typically $15,000 to $45,000 for a mid-size off-road diesel, before downtime. A small excavator out of service for a two-week engine job during peak season costs the contractor far more in lost revenue than the rebuild itself.
That cost gap — often the difference between a cooler replacement costing around $1,500 and an engine repair that can exceed $30,000 — is why many experienced fleet managers closely monitor oil cooler condition and address warning signs before a failure occurs.
The Inspection Routine That Catches Failures Early
Most oil cooler failures telegraph themselves for days or weeks before the catastrophic event. The trick is knowing what to look at, and how often. Here’s a check rhythm that takes minutes and catches the vast majority of problems.
- Coolant appearance. Pop the surge tank or expansion bottle and look at the coolant. Clean coolant is bright green, orange, pink, or whatever the spec — but always clear and uniform. Milky, foamy, oily, or brown-gravy looking coolant is the single most reliable early sign of an internal oil cooler breach.
- Engine oil condition. Pull the dipstick. Healthy oil is dark amber to brown and translucent on a fresh stick wipe. Oil that looks milky, gray, or has a coffee-with-cream tint has coolant in it. This is a stop-work-immediately finding.
- Coolant level trend. If the surge tank keeps needing top-ups and there’s no external leak on the ground, suspect an internal leak — head gasket or oil cooler. Track it. A pattern of unexplained loss is more diagnostic than a single low reading.
- Oil temperature on the gauge. On machines with an oil temp readout, watch the trend over a week of similar work. A creeping rise of 15–25°F at the same workload often means flow through the cooler is restricted.
- External seepage. Walk around the cooler housing and inspect for oil residue, weeping gaskets, or coolant streaks on the block face below it. Even a small external weep is a clear signal the gasket or seal is failing.
- Cooler fins (oil-to-air designs). On externally mounted air-cooled units, look for bent fins, packed debris, or mud caked into the core. Depending on cooler design and operating conditions, airflow blockage in the range of 30% or more can significantly reduce heat rejection and may be enough to push oil temperatures into a range that accelerates oil breakdown and engine wear.
The full check takes under five minutes once it’s part of the routine. It is, without exaggeration, the highest-leverage five minutes in your service rhythm.
Six Habits That Extend Oil Cooler Life
The oil cooler is mostly a victim of the systems around it. Most premature failures trace back to neglect somewhere upstream. The habits below address those root causes directly.
1. Stay on Top of Coolant Quality
Old, contaminated, or wrong-spec coolant is the leading cause of internal oil cooler corrosion. As coolant ages, its corrosion inhibitors break down, pH drifts, and the fluid starts eating the very metal it’s supposed to protect — including the thin internal walls of the oil cooler. Follow the OEM coolant change interval (usually 4,000 to 6,000 hours or every 2 to 4 years, whichever comes first) and test pH and inhibitor levels at every major service.
2. Don’t Mix Coolant Types
Mixing extended-life and conventional coolants, or topping up with whatever’s on the shelf, creates a chemical cocktail that accelerates internal corrosion. Stick with the spec. If the machine is changing hands or the history is unknown, do a full system flush and refill with the correct OEM-specified coolant rather than guessing.
3. Change Engine Oil on Schedule
Tired, sooted-up engine oil flows worse, transfers heat worse, and asks more of the cooler than the cooler was designed to handle. Stretching oil change intervals to save a few hundred dollars consistently leads to higher operating oil temperatures, which accelerates everything downstream — including the cooler. Follow the OEM interval and use the correct viscosity grade for the climate.
4. Keep the Radiator and Cooler Cores Clean
The oil cooler depends on the cooling system being able to dump heat. Mud, chaff, dust, and packed debris in the radiator or charge-air cooler core reduce overall heat rejection capacity, which raises coolant temperature, which raises oil temperature, which loads the oil cooler harder than it should be running. Power-wash the cooling stack regularly — more often in dusty or agricultural work.
5. Address Small Leaks Immediately
A weeping oil cooler gasket isn’t a “wait until next service” finding. Low coolant levels, even mildly low, mean the cooling system isn’t operating at design pressure or flow, which compromises heat transfer everywhere. A $40 gasket replaced today prevents a $20,000 engine job in six months. There is no patient version of this problem.
6. Don’t Idle Excessively in Hot Conditions
Long periods of high-idle in still air, especially with the implement hydraulics under load, is one of the toughest operating modes for an oil cooler. Airflow is minimal, but oil temperature continues rising. If the work pattern allows, shut the machine down between cycles rather than idling. The engine wear savings alone usually justify the habit.
Inspection and Service Intervals at a Glance
Different operating environments demand different rhythms. The table below is a starting framework — adjust based on actual operating conditions and OEM guidance for the specific machine.
|
Interval |
What to Check or Service |
Notes |
|
Daily |
Coolant appearance, dipstick condition, visible leaks |
2–3 minutes, operator-led |
|
Every 250 hours |
Coolant level check, top-up trend review, external cooler housing inspection |
Same as a typical service interval |
|
Every 500 hours |
Coolant condition test (pH, inhibitor strength), cooler core cleaning on air-cooled units |
Use test strips or a refractometer |
|
Every 1,000 hours |
Pressure test the cooler if any contamination signs present, inspect mounting hardware |
Pull samples for oil analysis |
|
Every 2,000–4,000 hours |
Coolant flush and refill per OEM spec, full inspection of cooler integrity |
Replace coolant filter if equipped |
|
As needed |
Oil cooler replacement when failure indicators present |
Don’t wait — see diagnostic section |
The intervals tighten significantly in severe service. Marine, dusty agricultural, and high-temperature climates can effectively double the inspection frequency for equivalent component protection.
Reading the Signs Before Catastrophic Failure
The earlier you catch a failing engine oil cooler, the cheaper the outcome. Here are the signature patterns experienced mechanics watch for.
Milky, sludgy coolant in the surge tank. This is the classic. Internal coolant passages in the cooler have cracked or corroded through, and pressurized oil is being pushed into the coolant side. Stop the machine. Don’t keep running it. Every additional hour of operation pumps more contaminated oil through the entire engine.
Oil that looks like a coffee milkshake on the dipstick. Coolant getting into the oil side. Usually rarer than the reverse direction (because oil pressure typically exceeds coolant pressure when the engine is running), but it happens at shutdown or with certain failure geometries. Same response: stop, diagnose, do not keep operating.
Coolant disappearing with no visible leak. No puddle under the machine, no obvious weep — but you keep topping up the surge tank. The coolant has to be going somewhere. The two main suspects are a head gasket and an oil cooler. Cooler is usually the cheaper outcome, and it should be ruled out first because the test is straightforward.
Rising oil operating temperature at the same workload. If the gauge or the telemetry system shows a slow climb in oil temp over weeks at otherwise consistent work conditions, the cooler is losing efficiency. Causes range from external fouling (easy fix) to internal scaling (often a replacement).
Oily film inside the surge tank cap. A thin oil sheen on the inside of the radiator or expansion tank cap, sometimes accompanied by faint bubbling at idle, is an early sign of an internal breach not yet bad enough to fully cloud the coolant. Catch it here and the repair is just the cooler.
External oil weep at the cooler housing. Visible oil residue around the cooler mounting flange or gasket area. Usually a failed seal or gasket. Replace promptly before it becomes an internal failure.
Common mistake: Treating an oil cooler problem like a head gasket problem and going straight to a head pull. On most heavy-duty diesels, a failed oil cooler produces nearly identical symptoms — milky coolant, unexplained coolant loss, oil contamination — at a fraction of the repair cost. Before assuming a head-gasket failure, include the oil cooler in the diagnostic process and pressure-test it where appropriate, particularly because oil cooler failures can produce symptoms that closely resemble head-gasket issues. A surprising number of “blown head gasket” diagnoses turn out to be a $500 cooler hiding behind a $15,000 misdiagnosis.
When to Repair vs Replace
Oil coolers aren’t typically rebuildable in the field. The decision is almost always replace, not repair — but the trigger points are worth knowing.
|
Condition |
Action |
Notes |
|
External gasket weep, no contamination |
Replace gaskets and seals |
Cheapest fix; do not delay |
|
Restricted flow, no contamination |
Clean if oil-to-air; replace if oil-to-coolant |
Internal scaling rarely cleans up successfully |
|
Milky coolant or oil contamination confirmed |
Replace the cooler immediately |
Also flush the cooling system thoroughly |
|
Pressure test failure |
Replace the cooler |
Don’t second-guess the test |
|
Visible external damage, fin crush, impact |
Replace if heat rejection is compromised |
Minor cosmetic damage is acceptable |
|
Cooler is at or past OEM service life |
Plan replacement at next major service |
Proactive replacement is cheaper than reactive |
When replacing components, choose genuine or high-quality aftermarket parts that meet or exceed OEM specifications. Premium aftermarket oil coolers from established suppliers are built to the same dimensional, pressure, and thermal performance standards as factory units, often at a meaningful cost saving — especially on older machines where OEM lead times can stretch into weeks.
Replacement Parts: What to Look For
Not every aftermarket oil cooler is built the same. Three things matter more than price.
Pressure and flow specifications. A replacement cooler has to match the engine’s oil pressure rating and flow capacity. A unit rated below the system’s working PSI will fail early; one with restrictive internal geometry will starve the engine of cooling at high RPM. Reputable suppliers publish working pressure, burst pressure, and flow capacity for each unit. If those numbers aren’t on the product page, that’s the answer to your question.
Fitment data. Oil coolers are highly machine-specific. Mounting bolt patterns, port sizes, port orientations, and overall dimensions vary not just by engine family but by build year and serial number range. A “fits multiple applications” listing without specific cross-references is a warning sign. Look for parts cross-referenced to your exact engine model, equipment make, and serial number range — and ideally with an OEM part number cross-reference table on the listing.
Material and warranty. Modern oil coolers are primarily aluminum for thermal conductivity and weight. The aluminum grade, weld quality, and gasket material directly determine service life. High-quality aftermarket components that meet or exceed OEM expectations should carry a clearly stated warranty — typically 12 months or a defined hours threshold — backed by a supplier with documented batch traceability and a straightforward returns process.
A consistent supplier relationship pays off beyond any single transaction. Predictable stock on common wear items, fast cross-referencing across mixed fleets, and accurate fitment data reduce downtime more than any one-time discount ever will.
Hot Climates, Cold Climates, and Hydraulic Oil Coolers
Two operating environments deserve specific attention because they put unusual demands on the cooling system.
Hot, dusty, and high-altitude work. Higher ambient temperatures, reduced air density at altitude, and packed debris in the cooling stack all conspire to push oil temperatures up. Operators in deserts, quarries, or anywhere above 3,000 feet of elevation should tighten the inspection rhythm and consider upgrading to a higher-capacity cooler or auxiliary cooler if the machine consistently runs hot at workload. Clean the cooling stack weekly, not monthly, in these conditions.
Cold-climate operation. Cold starts are harder on oil coolers than most operators realize. Cold, thick oil at startup creates high differential pressure across the cooler, which over thousands of cycles fatigues gaskets and welds. Let the machine warm up properly before applying full load. In extreme cold, a block heater that gets coolant temperature up before crank dramatically reduces this fatigue cycle.
A note on the related component most owners ask about: the hydraulic oil cooler heavy machinery owners often ask about works on the same principles but is a separate system from the engine oil cooler. On most excavators and wheel loaders, the hydraulic cooler is a larger oil-to-air unit mounted alongside the radiator stack. It fails in similar ways — clogged fins, internal leaks, fatigued gaskets — and benefits from the same inspection rhythm. Don’t conflate the two. They’re separate parts with separate failure modes and separate replacement intervals.
Building a Cooling-System Maintenance Log
Most fleets keep service records. Few keep records that are actually useful when a cooling problem develops. A good cooling-system log captures, at each inspection: the operating hours, coolant condition test results (pH, inhibitor strength, visible appearance), oil temperature trends if telemetry is available, any top-up amounts added, and notes on external inspection findings.
Over time, this becomes a wear curve for the cooling system. You see the moment coolant chemistry starts drifting. You see the slow climb in average operating oil temperature that precedes a cooler failure by months. You catch the unexplained 50ml top-up that turns into a 500ml top-up that turns into milky coolant. That single shift — from reactive to data-informed maintenance — can often reduce unnecessary parts spending, and in some fleets may reduce cooling-system-related maintenance costs by 20% or more, because components are replaced based on condition rather than after a failure occurs.
Bringing It Together
The engine oil cooler is a small part doing a big job, mostly invisible until it isn’t. The maintenance is not complicated. The inspections are not time-consuming. The consequences of getting it right are an engine that delivers the hours it’s supposed to. The consequences of getting it wrong are measured in five-figure repair bills and weeks of downtime that you can’t bill back to anyone.
Fleets that build the inspection rhythm — coolant appearance every shift, condition testing at service intervals, planned replacement instead of run-to-failure — see their engines last longer, their cooling-system spending become predictable, and their summers become a lot less stressful. Fleets that don’t, eventually pay for the lesson.
When the cooler does need replacement, choose components — genuine or high-quality aftermarket — that meet or exceed OEM specifications, source them from a supplier who can document pressure ratings, fitment, and material specs, and replace the gaskets and coolant at the same time. That’s how you get the full working life out of the cooler, and out of the engine it protects.

About the Author